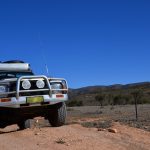
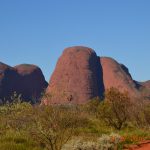
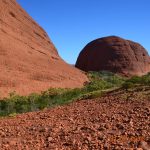
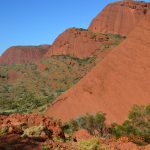
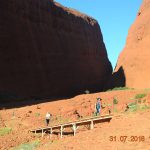
Photos
Trip Report
The trip report for our journey across the Great Central Road is separated into two sections. This first section comments on various aspects of preparations for the journey and how things worked.
General Observations
While we have done a couple of shorter journeys, this was the first long trip we have done towing the camper trailer. Previously all our long trips away were done with the car topper tent up on the rack, and the logistics and what was possible each day changed significantly with the trailer in tow. What was carried, what had to be prepared, and what was a reasonable day’s travel all varied by quite a margin. On our round Australia trip with the car topper we averaged 900 Kms per day when on the move. By comparison a 700 Km day was a solid day with the trailer on behind. Set up and take down times were also longer, but compensated for by having self contained living quarters available with the added comfort that offered. Preparation started several months previously, and involved careful review and servicing of both the camper and the truck.
Camper Preparation
The camper had a spray sealer applied underneath, and checker plate armour added to the underfloor behind the wheels to minimise stone damage given we would be doing thousands of Kms over unsealed roads. The wheel bearings were replaced, shock absorbers removed and checked, a new deep cycle battery fitted, additional LED lighting and more 12v outlets installed, and the 3 way fridge serviced. The awning was modified to make erection fast and easy, and a storm fly sheet was made in case of any particularly bad weather.
Heavy duty aftermarket recovery points were fitted to the chassis at the rear in case we either had to haul the trailer out of a difficult position or we had to extract anyone else with the trailer in tow. A generator and chain saw were added to the equipment spec, a pair of steel 20L jerry cans that fitted the front rack were added, and a 9kg gas bottle and new regulator installed. Curtains were made for the two clear view windows, and a foam topper pad was added to the bed for extra comfort.
A porta-potti was added to cater for toilet needs at any remote stops, and a solar camp shower added. The final item we did to the camper I think proved very useful. With the car topper tent, one mod we made to it was to fit a blanket lining under the roof. That proved brilliant in stopping condensation forming on the inside of the canvas roof on very cold nights. We similarly made up an internal roof lining over the bed in the camper using a flannelette sheet, and had no condensation problems during the trip in spite of many very cold nights.
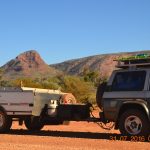
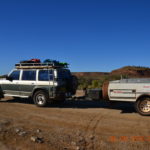
The camper is a Cub Regal Supamatic Off Road model. It is very simple and robust, and I was confident it would handle the trip. Suspension is a solid beam axle with heavy duty springs and shock absorbers. It has steel off road wheels and good all-terrain tyres, and the hard floor set-up is very easy to adapt to any terrain. What was a solid package to start with was made journey-ready. Cub’s reputation for making very solid reliable camper trailers proved itself, and we had no problems with it during the trip. The stud pattern is the same as the Patrol, but wheel diameter is 15″, not 16″, but at a pinch it could use the additional 16″ steel spare we carry on the rack, and for that matter the 15″ trailer spare could get us by on the truck if it had to. 3 spares between the vehicle and trailer seemed adequate.
Vehicle Preparation
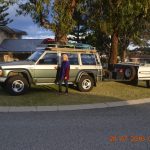
Our Nissan Patrol is a well developed and well-travelled vehicle, but several items were renewed or added for the trip. Its well used rubber suspension bushes were replaced through the entire front and rear suspension with polyurethane bushes, and the West Coast Suspension h/d touring springs that were installed for our round Australia trip were replaced with a set of Lovell’s 50mm lift springs, heavy duty in the rear and medium in the front. The spring selection was made on the basis that the vehicle does a lot of towing (not just the camper), and a 90L LPG tank and an 85L petrol tank are fitted in the rear, together with a heavy car fridge when we travel. The TB42E engine has an alloy head and is not as heavy a power plant as a TD42 which has a cast iron head, the bull bar is alloy, and we do not have a winch installed, meaning the medium weight springs carry the load on the front of the vehicle very well and keep it level.
One fault that might have proven an issue was fortunately discovered during the suspension work. In order to remove the RH rear upper control arm the auxiliary petrol tank that is fitted inside the chassis rail on the RH side had to be removed. It was discovered that when it was originally fitted the workshop that did it had left a protruding seat belt bolt that had been rubbing on it, and over time might have had the potential to penetrate the tank. It was trimmed. The rear suspension has near new Old Man Emu Nitrocharger shock absorbers that are in good condition, and the West Coast Suspension heavy duty shocks on the front were tested and found to be working well.
While the suspension work was being done we also took the opportunity to fit a 4WD Systems locker to the front diff, all new diff bearings were fitted too, and the front wheel bearings, hubs and CV joints were serviced and any necessary parts replaced.
A heavy duty steering box was installed, and a refurbishment kit was fitted to the power steering pump, and an Old Man Emu Nitrocharger steering damper was installed. The alternator was replaced with an uprated unit, and an Anderson plug was wired to the rear to connect the camper trailer electrics to the vehicle. A full vehicle service including spark plugs was done (not an easy job on the TB42E as the EFI inlet manifold has to be removed), and several of the small vacuum hoses were replaced.
The sealed beam headlights were also replaced with a set of Hella halogen lights, and I swapped over the UHF 6db antenna kit for the 9db kit that gives greater radio range, and an insect barrier was made up and fitted over the radiator intake. An additional jack was also added to the kit.
One other nifty addition was installing a RAM Mount kit to take the iPad for use as a GPS. This was attached to the grab rail above the glove box, allowing the iPad to be swivelled towards the driver or passenger as required. Prior to departure we had experimented with various GPS apps, all of which we found have strengths and weaknesses, (Hema Explorer, Google Maps, Pocket Earth) and settled for the Hema 4WD Maps app which we found easy to use and ideal for what we wanted. A Waeco inverter is also installed allowing us to easily keep the iPad or other small items charged while on the move.
The cargo management system installed in the middle and rear of the vehicle was not modified further this trip, (it is our Mk 3 version and seems to work well), but extra cross bars were fitted to the h/d alloy roof rack to add more attachment points, and I made an extra pedestal for the rack for each side to further distribute the load on the gutters. I also made some supplementary traction mats to augment the Treds if needed, but they were not called upon this trip.
We also replaced the tyres with new A/T’s. Previously we had run Maxxis A/T’s which had given us 80,000kms of good service, but this time I had a set of Yokohama Geolander A/T-S’s fitted. I discussed tyre size choice with the workshop that has serviced the vehicle ever since we bought it nearly 20 years ago now, and their advice was to stick with a set of 31″ tyres rather than opt for 33’s, even though we have adequate guard clearance. The reasoning is simple. Increasing tyre diameter by 2″ only raises the diff ground clearance by 1″, but the 10% change in rolling circumference puts the engine in a rev range that causes it to lug hard at lower revs for any given speed, actually increasing fuel consumption, and effectively lowering power available. It also means that speedo and odometer readings are similarly inaccurate, and you also lose some of the benefit of the crawler gearing in low range. For a change in tyre diameter to be done properly it requires re-gearing and possibly a boost in power output, something that we felt was not justified.
We set out with a fully serviced trailer and vehicle, so how did it all work?
Issues
A journey of this type always throws up the unexpected, but virtually everything worked brilliantly. The main issue we had was electrical, but it was easily overcome. The vehicle has two batteries and there is also one in the camper, running two fridges. A 70L Waeco 12v fridge in the vehicle and the 3 way fridge in the camper that has to be switched to 12 volts if you want it to continue cooling while on the move. The batteries that run all this have to be charged by the alternator.
The main cranking battery is isolated when the engine is not running, but the camper and auxiliary battery are connected for charging and run all the 12v electrics in both the vehicle and camper when not being charged. A combination of the auxiliary battery in the vehicle running below par and the fridge in the camper drawing more current than the present charging system can effectively sustain saw the camper battery being drawn down to very low levels each day and required being put on the battery charger each night.
We solved the issue in part by replacing the auxiliary battery in the vehicle, and not running the 3 way fridge during the day when travelling. It stayed cool enough, so wasn’t a big issue. The longer term solution will be to have a more sophisticated charging system fitted that boosts the power to the supplementary batteries. I understand Redarc have products that will do this, but they are very expensive.
We had two mechanical issues, again both relatively easily solved. Both occurred while travelling the rough unsealed road through the Flinders Ranges to Arkaroola. The first sounded like a stone lodged in between the shield and a brake disk. We couldn’t see anything when we stopped to investigate, and moving forwards or backwards didn’t dislodge it. Ruth then noticed what the problem was. The protection shroud for the LPG tank had fallen loose, three of the four mounting points had literally sheared off with all the rough road running we had done, and the shield was dragging on the ground with the fourth mounting point about to break off.
Being a kayaker, I had spare kayak tie downs in the vehicle, and I used two of them to secure the shroud back in place, and it stayed like that all the way back to Perth. The mechanic at Arkaroola added a pair of occy straps to supplement the tie downs, and it has remained in place since, (more of him later in the travel report, interesting chap).
The other was the vehicle began running rough and very rich just as we got into Arkaroola Village. A quick inspection under the bonnet revealed the top of the air filter box had become dislodged and associated with it a small vacuum hose connected to a sensor nearby had been disconnected. Again, a legacy of many days of running over rough roads. Refastening the filter box and putting the hose back in place fixed it, and we have had no further trouble.
So, what did we experience?
Camper Trailer
The Cub camper trailer towed superbly. We dragged it for days over some very rough roads, and it gave no trouble and ran without any other problems, providing a cosy little home for the journey.
The most unusual thing that happened occurred crossing the GCR. On the drawbar of the camper is a water outlet that is fed either by gravity feed from the tanks or by a small in line 12v pump. It is controlled by a small tap next to the outlet, and it is protected by a steel plate in front of it. In spite of that, on two occasions flying stones managed to bump the tap causing it to open slightly and the camper drained some of its water supply as we travelled. It wasn’t a big issue. The camper has two tanks, the main one is 80L and the supplementary tank is a further 40L. The second tank can be isolated from the linked outlets to form an emergency water supply. We lost around half the main tank’s contents , so no risk of running short. I taped up the tap which solved the problem, but will fit an extra shield to protect it better in future.
GQ
The Patrol also ran day after day without any problems other than the above. Everything worked well, and the detailed preparation prior to departure meant that the spares and emergency items carried remained in their crates and were not touched. Here are a few specifics of how things went.
Fuel
Being a dual fuel vehicle. our strategy is to run on LPG when it is available, and switch to ULP when it can’t be obtained in more remote locations, keeping the LPG tank filled as an emergency reserve. All up we carry 90L’s of LPG, 85L’s of ULP in the auxiliary tank, and 90L’s of ULP in jerry cans (2 x 20L on the camper and 2 x 25L on the rack). This gives us exceptional range, and also the ability to minimise buying fuel at very high prices in some of the remote road houses. I think Warakurna was the worst at $2.40/L for ULP. The fuel strategy worked well. LPG is an exceptionally clean burning and economical fuel. I run on it almost exclusively when in Perth, and the oil after 5000Kms looks almost new and uncontaminated. Even after more than 7000Kms this trip running on both fuels the oil is very clean.
Oil Pressure and Engine Running
I have been running a Penrite Premium 20W60 oil lately, and it held its viscosity and the engine held better oil pressure over sustained running than it has since it was new. It clicked over 360,000 Kms during the trip and just purred along. The Opal fuel available in the middle of the country did not cause any issues, and engine temps remained mid range even when the engine was working harder than usual.
Tyres and Speeds
I am genuinely impressed with the way the Yokohamas performed. Many days of running over some very rough roads has not caused any tread chipping or appreciable signs of wear, and the sidewall protection did its job particularly well during the very rough and rocky sections on the Skytrek tour. Traction was superb, no wheel spin on any of the 4WD tracks, and the vehicle tracked very truly, even on the roads which had long rutted sections from vehicles that had run over them when they were wet recently. They run reasonably quietly on sealed roads too.
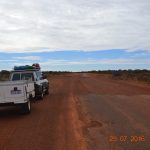
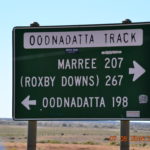
Our strategy with the tyres was to lower the pressures and reduce the speed on rough roads, and that gave us reasonably comfortable running. For the Great Central Road we set pressures for both the car and trailer at 28psi and cruised around 80Km/h until forced to slow for the later sections. For the even rougher Mereenie Loop we lowered them further to 26psi and kept speeds to around 70Km/h. Same for most of the William Creek Rd and Oodnadatta Track and the unsealed sections in the Flinders Ranges. For Skytrek we set pressures to 25psi.
Our 160L/min high pressure air pump did a superb job of quickly bringing pressures back up to highway levels (32-34psi) when we travelled sealed sections. The Yokohamas are particularly sensitive to small changes of pressure. Have them too hard and they transmit vibrations through the vehicle, get them right and they are great. They respond very well to lowering pressures and increasing the contact patch and providing softer running when needed. Not one puncture or any damage during the entire trip. The Treva A/T’s on the camper also performed very well and gave no problems.
GPS Software
The Hema 4WD Maps app did exactly what we wanted, a simple to use GPS that tracked our position and gave us the info we wanted. I had prepared a route plan with Pocket Earth and transferred the GPX file to the Hema app, but that wasn’t really necessary. Ruth found that compared with previous trips using hard copy maps, compass and odometer readings to estimate our position that using the iPad was easy. She turned from a naviguesser into a navigator. Being able to scan ahead and see what the next stage of the journey held in store was also very useful.
About the only thing I found odd with the Hema app is when using it to look ahead when you are not travelling, it does not automatically link to the next map, you have to select it from a list of available maps that might suit the area you are looking at. When moving however it will auto load the next map when you get to the edge of the one you are on.
One thing that was puzzling though was an apparent 5% discrepancy between the speedometer reading and GPS speed reading. Previously when passing roadside radar tests the speedo has returned pretty accurate readings, however the GPS says it reads 5% over the actual. I guess it might save a few annoying speeding tickets if it is correct.
Photography
Back when people shot photos using film I had a very good Cannon SLR with a great choice of lenses, but since film has gone out of vogue I have used a compact waterproof digital, which is Ok for snaps but not much use for travel. Luckily though, our eldest son recently gave me a Nikon digital SLR that he was no longer using, complete with a good choice of lenses. I chose an 18 to 270mm combination wide angle to zoom autofocus lens with manual focus over-ride to take away, and used the choice of standard options the camera offered for various types of photos. Results were very pleasing. You would just about need a degree in photography to use all the capabilities the camera has, and I had neither the time (or patience) to invest in learning the more complex options it has. Very happy with it using its pre-set selections.
Ruth used her iPhone to also take various shots and shoot short videos out of the car while we were moving, and there are some good results there too.
Food Prep
We took an emergency supply of a weeks food in case of bad weather and getting stuck on any of the remote tracks. Recently several vehicles had been bogged for a few days on the remote unsealed roads, and we wanted to ensure there were no problems if we found ourselves having to wait out bad weather anywhere. None of that was touched. We had fine weather the entire trip, and roads were dry, albeit rough and rutted in many places.
For perishable food Ruth had vacuum sealed several days allowance of various meats and some pre-cooked meals prior to leaving Perth. That was excellent. They packed well in the fridge, lasted well, and we were very happy with the outcome. We will do more of that sort of prep prior to future trips.
Lights
The uprated Hella halogen headlights combined with the Hella spot lights gave great illumination for the two lots of night driving we did. On the final day I decided to get back to Perth in one long haul from Caiguna on the Nullarbor, and we had several hours of night driving to complete the trip. No eye strain, and even on low beam the level of illumination is very good. For tight tracks about the only addition I might consider would be an LED light bar to increase spread.
Red Dust
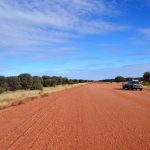
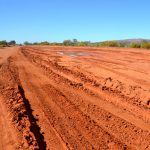
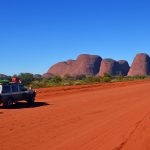
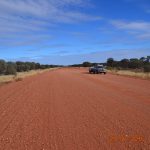
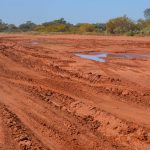
No matter what means you use to try and stop the stuff, (windows up, air on recirculate, fan on etc) it is like fine talcum powder and it gradually permeates everywhere, and by day two on the GCR there was some regular cleaning required. Since returning an initial clean has got rid of most of it, but more thorough detailing will be needed to get it out of every nook and cranny. Most days the floor of the camper required a brush once it was opened, although sealing an air vent certainly helped minimise dust entry there. Drive long distances on unsealed roads in Oz and it is your constant companion.
So, all up good gear and good preparation minimised any problems, and those we had were easily solved. Having a relatively trouble free run certainly makes a journey of this type a pleasure, and we will look at other trips in the future. Four we have on the list of considerations are Tasmania, the Kimberly, the Cape, and I would like to do a Simpson Desert crossing sometime, although I think I might have difficulty in persuading Ruth to do that one. We’ll see….


